When it comes to creating an energy-efficient home, insulation upgrades are an important consideration that should not be overlooked. Most homeowners never do this, so you can set yourself apart by taking this step! By inspecting for issues and upgrading insulation every 5-10 years, you can significantly enhance your home’s energy efficiency, reduce utility costs, prevent ice dams, and enjoy a more comfortable living environment, and even Improve Your Home’s Value. In this article, we’ll discuss how to assess the condition of your insulation, different types of insulation, things you can do, and things better left to contractors. We will also discuss their relative costs, and provide examples of how upgrading insulation can benefit your home. While this is one solid way to save costs in the long run, make sure you read our post on Homeowner Essentials: Common Sense Tips that every homeowner should know.
How To Assess Your Home’s Needs for Insulation Upgrades:
Assessing the insulation in a home involves visually evaluating its condition, identifying potential areas of improvement, and determining if insulation upgrades are necessary. Here are some steps you can take to assess the insulation in your home:
-
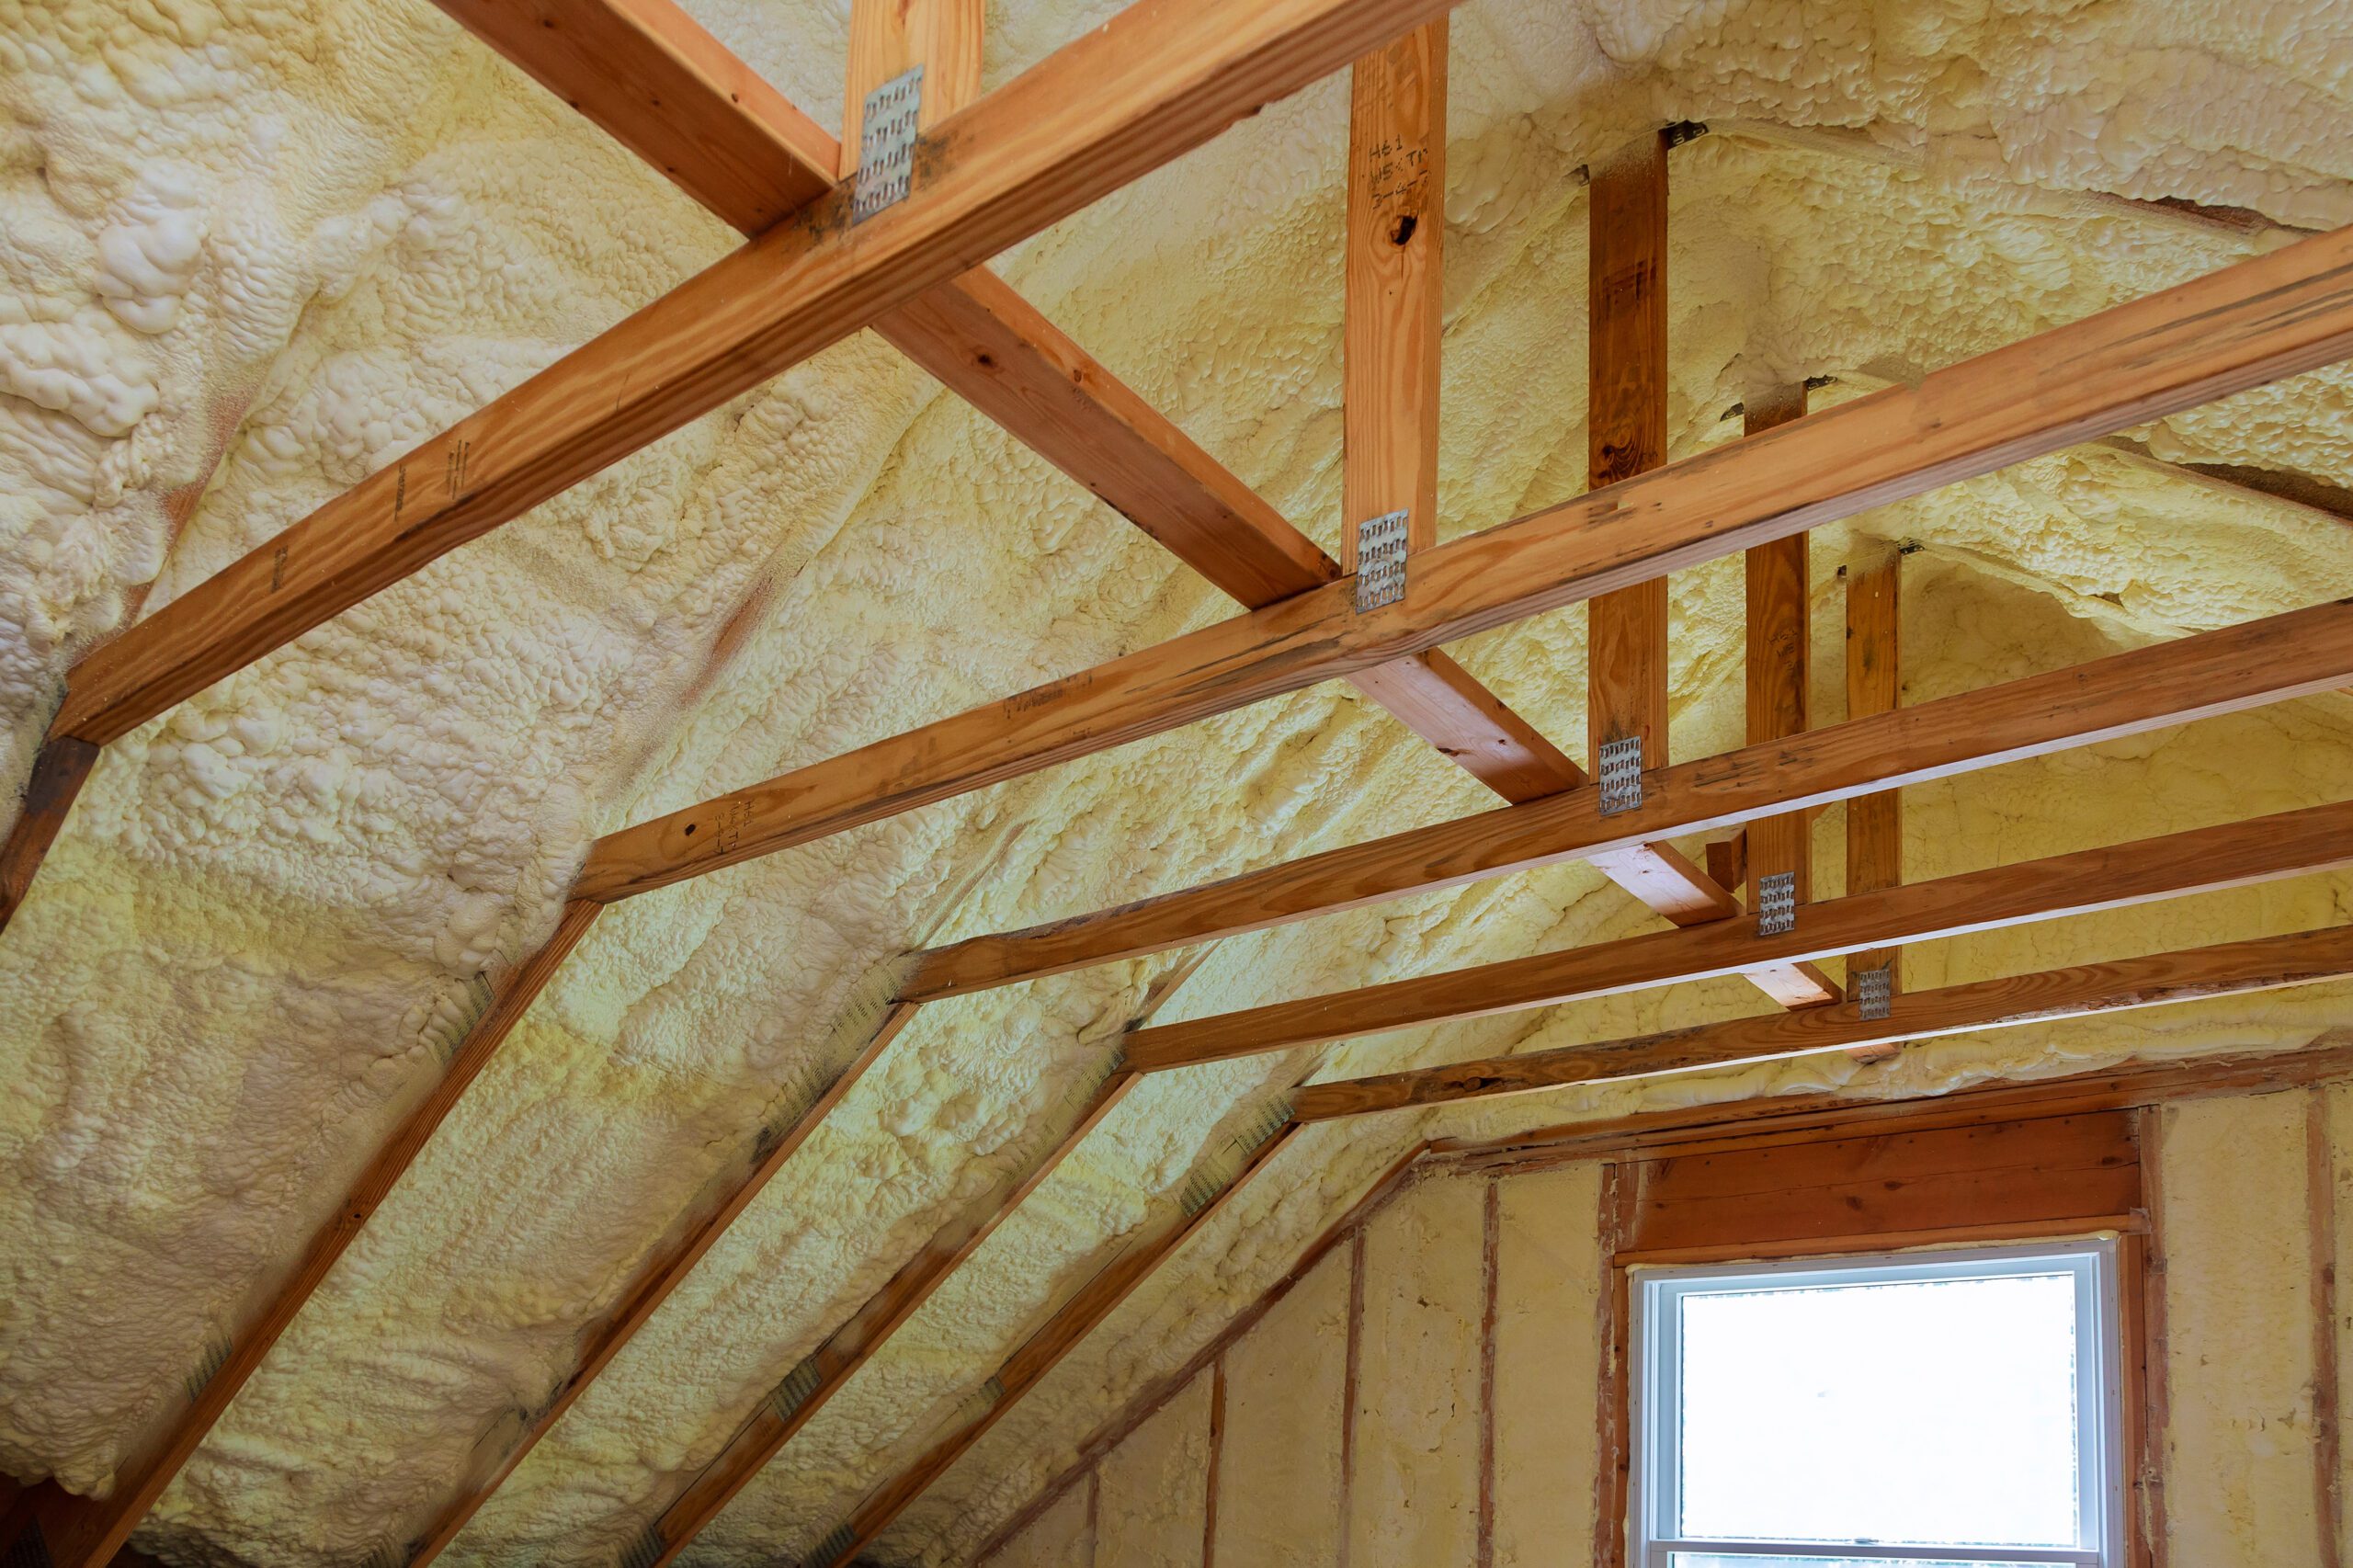
Visual inspection: Start by visually examining the insulation in accessible areas of your home, such as the attic, crawl spaces, and unfinished basement. Look for signs of damage, such as sagging, compression, water stains, mold growth, or pest infestation. These issues can indicate insulation problems that require attention.
-
Energy audit: Consider hiring a professional energy auditor or insulation contractor to conduct a comprehensive energy audit of your home. They will use specialized tools, such as thermal imaging cameras, to identify areas of heat loss or air leakage. This will help pinpoint specific locations where insulation may be lacking or ineffective.
-
Air leakage assessment: Insulation alone is not sufficient if there are air leaks in your home. Assess the air sealing of your home by checking for drafts around windows, doors, electrical outlets, and plumbing penetrations. A blower door test performed by a professional can help determine the extent of air leakage and guide you in improving your home’s airtightness.
-
Performance evaluation: Evaluate the effectiveness of your insulation by monitoring your energy bills and assessing indoor comfort levels. If you notice significant fluctuations in energy consumption or have difficulty maintaining consistent temperatures throughout your home, it may indicate insulation deficiencies.
-
Building codes and standards: Familiarize yourself with local building codes and energy efficiency standards to understand the minimum requirements for insulation in your area. Compare your home’s insulation to these standards to determine if an upgrade is necessary to meet current regulations. If you are not up to code, your home is most likely grandfathered, however as technology improves over time, it may be worthwhile to bring your home into code.
-
Consult professionals: Seek advice from insulation contractors or energy auditors who specialize in insulation upgrades and assessments. They can provide expert insights and recommendations based on your specific home and insulation needs.
By combining visual inspections, energy audits, air leakage assessments, performance evaluations, and professional consultations, you can gain a comprehensive understanding of your home’s insulation status. This will help you identify areas for improvement and make informed decisions about whether an upgrade is needed.
Small DIY Insulation Upgrades You Can Easily Do Yourself
-
Weatherstripping: Install weatherstripping around windows and doors to seal gaps and prevent drafts. Self-adhesive weatherstripping strips or door sweeps can be easily applied to close gaps and reduce air leakage.
-
Caulking: Use caulk to seal gaps and cracks around windows, doors, and other areas where different building materials meet. Apply caulk to seal air leaks and prevent heat loss.
-
Outlet gaskets: Install foam gaskets behind electrical outlet and switch plates on exterior walls. These gaskets help insulate against air leakage through the outlets.
-
Pipe insulation: Insulate exposed hot water pipes and heating ducts with pipe sleeves or foam insulation. This helps prevent heat loss and ensures hot water stays hot as it travels through the pipes.
-
Attic insulation: If your attic has insufficient insulation, you can add more to improve energy efficiency. Roll or blow-in insulation can be easily installed by homeowners. Make sure to follow safety guidelines and wear appropriate protective gear.
-
Insulated attic hatch cover: Create or purchase an insulated cover for your attic access hatch or pull-down stairs. This helps prevent heat transfer between the attic and living spaces.
-
Window film or thermal curtains: Apply window film or hang thermal curtains to enhance insulation around windows. These products help reduce heat transfer and drafts.
-
Insulating water heater and pipes: Wrap a water heater blanket around your water heater to prevent heat loss. Additionally, insulate hot water pipes near the water heater to reduce heat loss during distribution.
-
Insulate HVAC ducts: Insulate exposed HVAC ductwork in unconditioned spaces, such as the attic or crawl spaces, to prevent heat loss or gain.
Here’s a few links to some great products for the DIY insulation Upgrades from Amazon!
Insulation Upgrades Better Left Up To The Pros
While these are small DIY insulation fixes homeowners can make, there are certain tasks that are best left to the professionals. These tasks often require specialized knowledge, experience, and equipment. Here are some examples:
-
Insulation installation in inaccessible areas: Insulating areas that are difficult to access, such as wall cavities or tight crawl spaces, is best handled by professionals. They have the expertise to navigate these challenging spaces and ensure proper installation without damaging the structure.
-
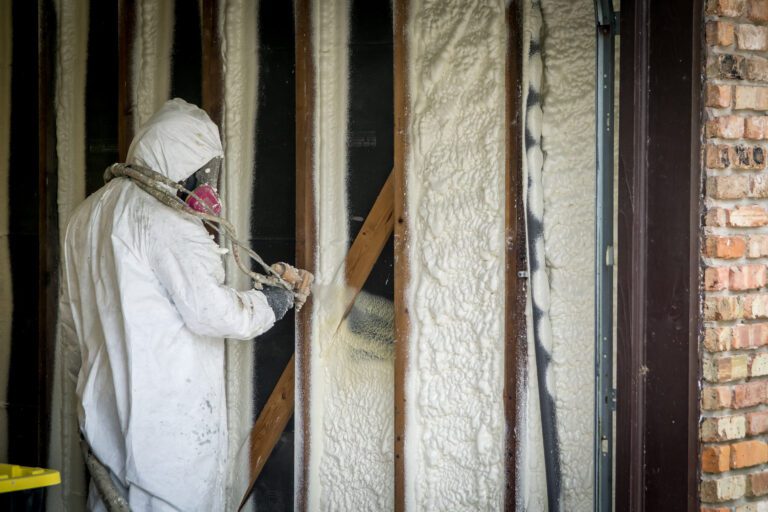
Spray foam insulation (Shown above): Installing spray foam insulation typically requires professional equipment and training. Improper application can lead to issues such as inadequate coverage, off-gassing, or moisture problems. Professional insulation contractors have the necessary experience and safety protocols to handle spray foam insulation correctly.
-
Retrofitting insulation: Retrofitting insulation in existing homes often involves assessing the current insulation, identifying areas for improvement, and implementing appropriate solutions. It may require addressing issues such as air sealing, moisture control, and ventilation. Professionals can provide a comprehensive assessment and develop a customized insulation plan tailored to your home’s specific needs.
-
Insulation upgrades in multi-story or complex structures: For buildings with multiple stories, unique architectural features, or complex structural elements, professional insulation installers can ensure that the insulation is properly integrated throughout the entire structure. They have the knowledge and expertise to handle challenging installations and ensure optimal performance.
-
Compliance with building codes: If you are required to meet specific building codes or energy efficiency standards, it is advisable to consult professionals to ensure compliance. They can guide you through the necessary steps and help you select the appropriate insulation materials and methods.
-
Large-scale insulation projects: If you are planning a major renovation that involves significant areas or multiple systems (such as roof insulation, exterior walls, and basement), it is recommended to work with professionals. They can manage the project efficiently, ensure proper insulation integration, and address any complexities that may arise.
It’s important to recognize your own limitations and consider the scope, complexity, and safety aspects of insulation projects. Engaging professionals ensures that the work is done correctly, maximizes energy efficiency, and minimizes potential issues down the line.
Types of Insulation
For informational purposes, I though it would be good to give you an idea of what types of insulation are out there when insulation contractors get involved. While this is only a high level outline, it should give you some background to help in your discussions with your contractor.
- Fiberglass Insulation: Fiberglass insulation is one of the most common and affordable options. It consists of tiny glass fibers that trap air and slow down heat transfer. Fiberglass insulation is suitable for attics, walls, and floors. It is widely used in new construction and retrofitting projects. CertainTeed Insulation and Owens Corning are well-known manufacturers offering high-quality fiberglass insulation. The installed cost for fiberglass insulation ranges from $1.00 to $2.00 per square foot.
- Cellulose Insulation: Made from recycled paper and treated with fire-retardant chemicals, cellulose insulation is an environmentally friendly option. It provides excellent thermal and soundproofing properties, making it an ideal choice for attics, walls, and floors. Cellulose insulation can be blown into existing walls or used in new construction. Brands like Greenfiber and Applegate produce reliable cellulose insulation products. The installed cost for cellulose insulation ranges from $1.50 to $3.00 per square foot.
- Spray Foam Insulation: Spray foam insulation is a versatile option that expands to fill gaps and create an airtight seal. This type of insulation offers superior insulation performance, air leakage prevention, and moisture control. Spray foam insulation is commonly used in attics, basements, and crawl spaces. Brands like Icynene and Dow Great Stuff provide high-quality spray foam insulation solutions for smaller quick fixes. The installed cost for spray foam insulation ranges from $2.50 to $4.00 per square foot.
- Rigid Foam Insulation: Rigid foam insulation is a durable and moisture-resistant option suitable for various applications, including exterior walls and foundations. It offers high R-values, providing excellent thermal resistance and minimizing thermal bridging. Rigid foam insulation is commonly used in new construction and retrofitting projects. Owens Corning FOAMULAR and DOW STYROFOAM are reputable manufacturers of rigid foam insulation. The installed cost for rigid foam insulation ranges from $2.50 to $4.50 per square foo
Factors to Consider For Insulation Upgrades: Climate Insulation Type
When upgrading insulation, your contractor should consider the climate you live in as it plays a significant role in selecting the appropriate insulation type. Different regions of the United States have varying temperature ranges and energy efficiency needs. Here are some insulation recommendations based on climate zones along with some data and typical costs. Should provide you with good background information to discuss with your contractor:
- Hot and Humid Climate (Zone 1): In regions with hot and humid climates like Southern Florida, it’s essential to focus on insulation materials that offer both thermal resistance and moisture control. Spray foam insulation, such as Icynene, is a popular choice due to its ability to create an airtight seal and resist moisture intrusion.
- Hot and Dry Climate (Zone 2): Areas like Southern California or Arizona experience hot and dry climates. In these regions, a combination of fiberglass insulation and reflective insulation is commonly used. Fiberglass insulation provides thermal resistance, while reflective insulation helps to deflect radiant heat from the sun.
- Mixed-Humid Climate (Zone 3): Regions with a mixed-humid climate, such as parts of the Midwest and Southeast, require insulation that can handle both moisture control and thermal resistance. Cellulose insulation, with its ability to absorb and release moisture without losing its insulation properties, is well-suited for these areas.
- Cold Climate (Zone 4 and 5): Northern regions with cold climates, including the Northeast and parts of the Midwest, demand insulation that offers superior thermal resistance. Rigid foam insulation, such as Owens Corning FOAMULAR, is commonly used in these areas to provide high R-values and minimize heat loss.
Remember to consult local energy efficiency guidelines and recommendations for your specific region to ensure optimal insulation choices.
|
Insulation Type |
R-Factor |
Cost Range (per sq. ft.) |
Typical Zone |
|
Rigid Foam Insulation |
R4.5-R8.0 |
$2.50 – $4.50 |
Zones 4-5 |
|
Spray Foam Insulation |
R3.5-R7.0 |
$2.50 – $4.00 |
Zones 1-3 |
|
Cellulose Insulation |
R3.2-R3.8 |
$1.50 – $3.00 |
All Zones |
|
Fiberglass Insulation |
R2.2-R4.3 |
$1.00 – $2.00 |
All Zones |
Note: The R-Factor represents the thermal resistance of the insulation material, indicating its effectiveness in preventing heat transfer. The higher the number, the better insulation capability. The cost range is per square foot and may vary depending on factors such as insulation thickness, brand, and installation complexity. The typical zone indicates the general regions where the insulation type is commonly used based on climate considerations. Please consult local energy efficiency guidelines and recommendations for specific recommendations tailored to your area.
Conclusion
By checking for issues and implementing insulation upgrades in your home every 5-10 years, you can significantly improve energy efficiency, reduce utility costs, and create a more comfortable living environment. Consider the different types of insulation available, such as fiberglass, cellulose, spray foam, and rigid foam. Choose the option that aligns with your needs, budget, and regional climate, and ensure proper installation for optimal results.
FAQs (Frequently Asked Questions)
Q1: Can I save money by installing insulation myself? Yes, if you have the necessary skills and knowledge, installing insulation yourself can save you approximately 20-30% on labor costs. However, keep in mind that more complex projects or large areas may still require professional assistance to ensure proper installation and maximize energy efficiency.
Q2: How long does the insulation upgrade process typically take? The duration of the insulation upgrade depends on the size of the project. Small areas can be completed within a day, while larger projects may take several days or even weeks. Discuss the timeline with your chosen insulation contractor.
Q3: What is the best insulation type for soundproofing purposes? Cellulose insulation is known for its superior soundproofing capabilities. If noise reduction is a priority, consider opting for cellulose in areas where sound transmission is a concern.
Q4: Can upgrading insulation help reduce condensation and moisture issues? Yes, upgrading insulation can help minimize condensation and moisture issues. Proper insulation installation, combined with adequate ventilation, helps maintain a balanced indoor environment, reducing the risk of mold growth and moisture-related problems.
Q5: Will upgrading insulation increase the value of my home? Improving insulation in your home can increase its overall value. Homebuyers are increasingly focused on energy efficiency, and a well-insulated home can be a significant selling point.
If you have a question or a message for us, enter it here
Otherwise you can post a public comment below – Thanks for visiting