


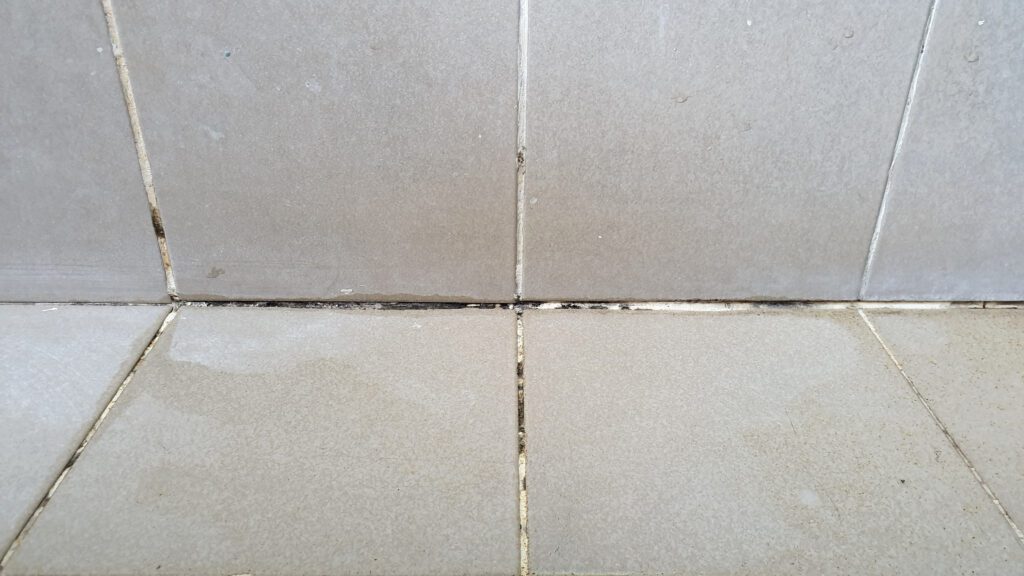
Knowing how to regrout tile without removing the old grout can save you time and money. However, you must remove any loose material, and scrape back a few inches from any areas where the grout has completely fallen out.
The process is also dependent on what type of grout you use. Epoxy grout is much more forgiving than cement grout and will require less old grout to be removed. Also, if the existing grout lines are too shallow, meaning they are close to being level with the tile surface, you might have to grind out a cavity in the existing grout line to receive the new grout.
Clean All mold or mildew
If you know how to regrout tile, you also know that the first step is always to make sure you clean all mold or mildew from the existing grout lines. This is important from a health and safety standpoint. If you start scraping moldy tile, the potential for spores to become airborne increases based on how aggressively you scrape. This could become a health hazard.
I’m a big fan of Clorox Bleach Foamer Bathroom Spray. I like this brand especially if you are doing wall tiles as the soap formulation gives it a bit more surface tension and allows it to cling to the treated area a little longer than just Clorox and bleach.
IMPORTANT – Turn Exhaust Fan On!
On most when you have to regrout tile, it will be in a bathroom. If so, make sure the bathroom exhaust fan is switched on and is running! Spray the moldy areas liberally with the Clorox Foamer Bathroom Spray and allow to sit for about 10 minutes before rinsing. If mold is still present, repeat the process as much as necessary to eliminate the discolored mold or mildew.
Rinse and Let Dry
Rinse the area thoroughly with copious amounts of water. Let the area dry for about 10-15 minutes with the exhaust fan running (on high if it’s a multi speed fan). You can squeegee or even dry with a towel to speed the drying process if desired.
Scrape off ALL loose grout
Using a quality scraper, make sure you remove any loose grout, paying special attention to areas where the grout may have fallen out completely. Make sure there is no loose grout on either side of where the grout has fallen out. If you grout over loose material, the life span of your new grout job will be shortened, especially if you are using cement grout.
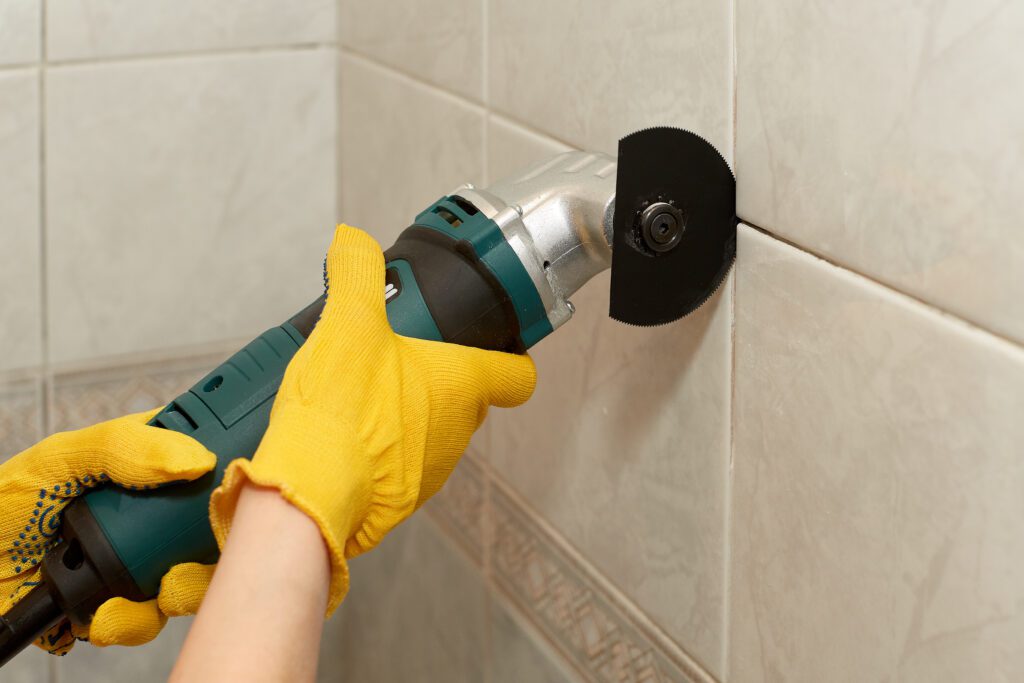
If the existing grout cavities are heavily filled and there is no space to fill in with the new grout, it is advisable to use a small mini grinder to give yourself a groove to fill in with the new grout.
Click the image below if you are interested in a quality mini grinder
Cement or Epoxy Grout?
Select an appropriate premixed high-quality grout. Especially for the DIY’er, premixed takes one variable out of the equation that could cause problems.
You can use either cement or epoxy grout. For re-grouting existing tiles, I suggest an epoxy grout. It is much more forgiving with respect to how much of the old grout you need to scrape away. Most manufacturers say you don’t have to remove the old grout, which is mostly true, but it’s still good practice for a longer-lasting job to clear away any old loose material.
As far as color choices, there are more available with cement grouts, so that may dictate your choice based on the extent of your job, especially if you need to match existing an existing color.
Spread the Grout with a Float
Use a high-quality float to spread the grout. If you are only doing a small section of a large tiled area and your able to match the color of the existing grout, you can do a targeted application and smear on the grout with a trowel or drywall knife directly over the grout lines to be fixed.
Then use a float as you would on any grout application to press the grout into the groves and off of the tile face holding the float at a 45 deg angle to the tile surface.
Sponge off the Tile surface
As you would on a new job, when you regrout tile, use a good quality sponge with a bucket of fresh water to clean off the tile surface. Ring out the sponge as much as possible before cleaning. You will have to rinse and ring out the sponge several times to make sure you get the tile surface clean.
Towel Dry the Tile Surface
After your last sponge off, take a clean dry workshop tile and dry off the tile surface. This will ensure you get the last remnants of haze from the grout cleaned off and leave the surface shiny. You can also use a haze remover such as these by Fila, one if for Epoxy, and one for Cement.
Becoming proficient in DIY projects like this can be rewarding in many ways. Becoming proficient in overall homeownership is vital for many reasons. Check out our post on Homeowner Essentials: Tips All Homeowners Should Know!
Good Luck!